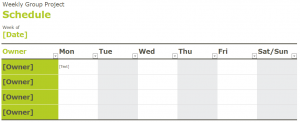
An easy way to organize a group project is with a set schedule. This helps avoid last minute work, and keeps everyone on the right track. The Group Project Schedule Template is an easy way to organize your group’s assignments in Excel over the course of a week so that everything gets done.
How to use the Group Project Schedule Template in Excel
Begin by downloading the spreadsheet into Excel. The simple layout features four spaces (you can add more) for member’s names and their tasks. Start by filling in the [Date] to match the week, and change [Weekly Group Project] to your project’s title.
In the green boxes, write each member’s names. A good tip is to put order the member’s names by how soon they need to finish their task. Once all four members are in place, move onto the dates in the columns to the right. In the column next to the name of the member, write their task underneath the date it is due. For example, Owner2 can have “Research” in the Monday box next to their name.
Depending on how extensive your project is, people may have multiple tasks throughout the week. The key is to list them all in order of importance. The rough draft can’t be started until the outline is finished, which is dependent on the research.
Tips on using the Group Project Schedule Template
- Keep the tasks you list short and direct. The more information you cram into one cell block, the harder your template will be to read.
- If the project extends past one week, print multiple copies to cover your timeline.
- Use the Excel highlight tool (located at the top under “home” with the paint bucket symbol) to categorize parts of the project.
- When one group member finishes their assignment, have them print or email a new copy with their task crossed off so the next person can immediately begin their task.
Download the Group Project Schedule Template
Template Courtesy of Microsoft
Check out this offer while you wait!

