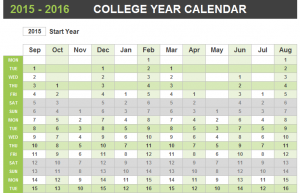
Keeping your entire appointment calendar for the year in one Excel document has its perks. Simply select the day you’re looking for and all your appointments will be shown in this calendar. The College Yearly Appointment Planner is an easy and effective way to track your activities for the school year.
How to use the College Yearly Appointment Planner
Download the template using Excel and open it to the first tab “Yearly Planner”. The starting year is pre-set to 2015, but you can type in whatever year you want to record for and the dates in the calendar will adjust automatically.
From here, go to the bottom of the template and click the tab labeled “Appointments”. This is where you can enter all of your appointments for the year at any time. Then, when you tab back over to “Yearly Planner”, you will see orange circle indicators on dates you have assigned an appointment to. When you click on that date, the appointments for the day will show on the right side along with the times you have assigned them in chronological order.
Tips for using the College Yearly Appointment Planner
- Keep this document on your laptop and check it daily to see what you have coming up. The right side will automatically show the current date, but you can click elsewhere to get your weekly overview.
- You can add and delete appointments at any time without messing up the template. Anything added or deleted will adjust to fit your planner.
- The weekends are automatically grayed out for you to create two separate calendars if desired: one for weekend activities only, and a strictly school/class calendar.
Download the College Yearly Appointment Planner
Template courtesy of Microsoft
Check out this offer while you wait!

