

The Auto Fill function in Excel is the quickest and easiest way to take one formula and use it throughout your entire page. Entering the same formula for different figures could turn into a real nightmare, especially when you have a few pages of data to comb through. Fortunately, the good people at Microsoft found a way for you to simply drag and drop the specific formula you need and implement it throughout your spreadsheet. The Auto Fill function is easy to use, but it often goes overlooked because Microsoft doesn’t include a shortcut button in the Home ribbon. Simply follow the steps listed below to get started.
Steps on How to Use Excel Auto Fill Function
If you want to download the example Auto Fill spreadsheet provided, you can use that to follow along. You can also use your intended spreadsheet, since this tutorial only requires a few steps to perform.
- Choose the cell you want to enter your formula
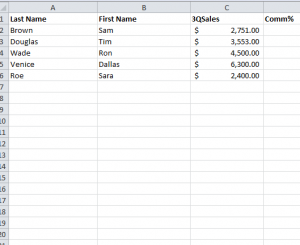
In the Auto Fill function sample provided, you’ll see that the template is tracking the commission earned by individuals of a sales team. The Cell E2 contains the formula “=C2*D2”. This multiplies their sales figure with their percentage rate and gives you their total commission earned.
- Click on the cell containing your original formula and press down on the black box displayed in the bottom right corner of that cell.
- Proceed to drag that box down the column through the entire length of your list to use the Auto Fill function
You’ll notice how your Auto Fill function calculates the other rows, even if they contain different percentages or numbers.
With the simple Auto Fill trick, you can save a lot of time and stress, instead of typing your formula for each row.
Download: How to Use Excel Auto Fill Functions
Check out this offer while you wait!