

Learn how to use Excel autocorrect with our easy guide. The autocorrect feature in Excel allows you to customize your work in Excel and automatically fix mistakes such as incorrect capitalization, and have entries converted to different pieces of text as you indicate. The autocorrect is something you only need to open once in Excel and it will apply to all your Excel sheets from that point on.
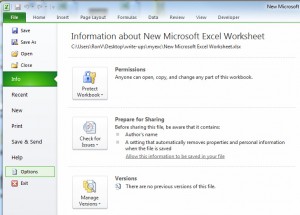
Start by opening Excel and clicking “File”, then “Options”.
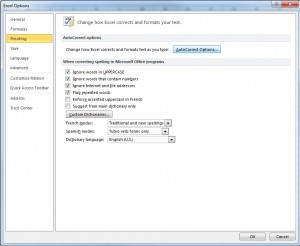
Next, choose “Proofing” and then go to “Autocorrect Options”, located to the right:
Now you will be at the autocorrect options dialog box in Excel:
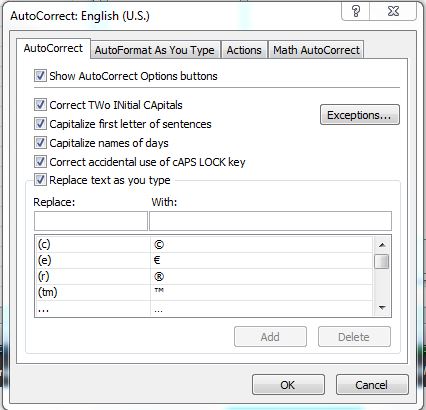
Here, you can check or un-check some options already in Excel. These are common autocorrect choices that fix normal capitalization errors and detect when you are writing out dates. You can also click “Exceptions” and choose to make these only operable in certain instances.
Near the bottom are two boxes with “Replace” and “With”. This is where you can enter your own autocorrect choices in Excel. For instance, if you always misspell “Mississippi”, you can put your common misspelling in there and have it automatically replace it with the correct spelling. There are also more replacements already added by Excel that you can change or delete entirely.
From here you can use the tabs in the dialog box to further customize your autocorrect. After you have everything as you want it, be sure to click “save” and then “ok”. Now these preferences will be applied to all of your Excel documents that you open and use. You can go back and change the autocorrect information at any time, but it will not apply retroactively to any Excel spreadsheets.
Check out this offer while you wait!