

Inserting more rows or columns on a table in Excel is needed when updating and adding onto an existing Excel sheet. The process is easy.
Start by highlighting the cell where you want to add a new row or column. Then, either right click the desired cell in the table or, you can use the Excel ribbon toolbar. Here’s how:
How to use the Excel Ribbon Tool
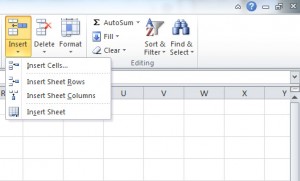
Before starting, make sure to have a cell selected where you want the change to occur.
Find the Insert, Delete, and Format buttons on the ribbon (pictured below). Click “Insert” and the following menu will show up when you have selected a cell inside a table.
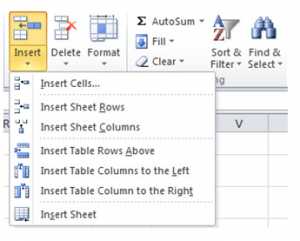
Choose from the options and your new row or column will be added.
How to Add or Remove Columns
Simply right click the cell you want to make a change in and the following menu will appear:
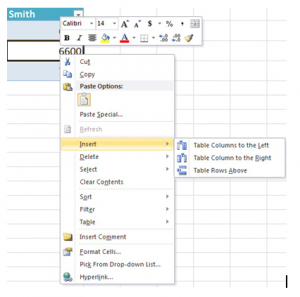
Select “Insert” and its options, or choose delete to completely remove the column.
Check out this offer while you wait!