

Learn to split text in Excel to separate data into new columns. This guide is useful if you need to split information such as first names and last names into new columns. Imported data often needs to be split to have it organized efficiently. The process of splitting text in Excel is simple once you know the steps, so follow along to learn this great Excel feature.
Download the example spreadsheet and follow along.
Step 1:
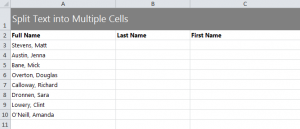
Select the range of cells you want split. In the example, it is cells A3 through A10.
Next, go to the top tabs and choose “Data”, then click “Text to Columns”.

Step 2:
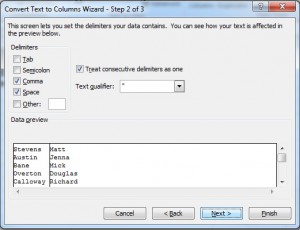
The pop up dialog box will let you click “Delimited”. Select that option and choose “next”. This will bring you to the Delimiters section which has multiple check boxes.
Click “Comma” and “Space” and leave the rest blank before clicking “next”.
Step 3:
In this next section, click “Test” in the column data format. Proceed to select the button to the very right of the text box you want your final input to be placed.
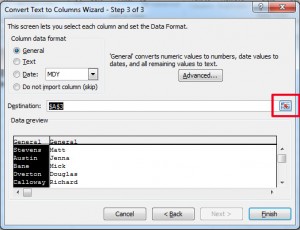
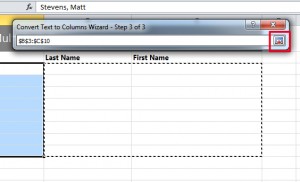
Choose the range (B3, etc) to indicate where your split text should go. click the button next to the range to finalize this step.
Step 4:
You will be returned to the original dialog box. Select “Finish” and if all has been done correctly, then you know have column B filled with first names, and column C with last names, effectively splitting the text in column A.
Learn more with our Excel Guides here.
Check out this offer while you wait!